kimizuka.hatenablog.com
kimizuka.hatenablog.com
kimizuka.hatenablog.com
kimizuka.hatenablog.com
前回 のつづきです。
予告通り、遠隔でシャッターを切れるように編集します。
まずディレクトリ構成を前回から大きく変更しました。

まず、前回の index.html、index.js、index.css はすべて app/index.html、app/index.js、app/index.css に移動しました。
今回、Webサーバ上にシャッターをきるボタンを持ったページを置きたく、
そのページのリソースを web/index.html、web/index.js、web/index.cssとするために、ディレクトリを分けました。
また、tmpディレクトリは、撮影した写真を保存するためのディレクトリです。
package.json
{
  "name": "app",
  "version": "1.0.0",
  "description": "",
  "main": "main.js",
  "scripts": {
    "test": "echo \"Error: no test specified\" && exit 1"
  },
  "keywords": [],
  "author": "",
  "license": "ISC",
  "devDependencies": {
    "data-uri-to-buffer": "0.0.4",
    "electron-prebuilt": "^1.2.1",
    "fs": "0.0.2",
    "node-static": "^0.7.7"
  }
}
Webサーバをたてるために node-static を追加しました。
main.js
"use strict";

var electron      = require("electron"),
    http          = require("http"),
    nodeStatic    = require("node-static"),
    app           = electron.app,
    ipcMain       = electron.ipcMain,
    BrowserWindow = electron.BrowserWindow,
    file          = new nodeStatic.Server("./web/"),
    mainWindow;

http.createServer(function (request, response) { // サーバをたてる
  request.on("end", function() {
    switch (request.method) {
      case "GET":
        file.serve(request, response);
        break;
      case "POST":
        switch (request.url) {
          case "/shoot":
            mainWindow.webContents.send("shoot"); // メインウィンドウにイベントを送信
            response.end();
            break;
        }
        break;
    }
  }).resume();
}).listen(3000);

app.on("ready", function() {
  mainWindow = new BrowserWindow({
    width  : 640,
    height : 500
  });

  mainWindow.loadURL("file://" + __dirname + "/app/index.html");

  mainWindow.on("closed", function() {
    mainWindow = null;
  });
});
Webサーバをたてる処理を追加しました。
また、ページ間でイベントをやり取りするためにipcMainをつかっています。
app/index.html (旧 index.html)
<!DOCTYPE html>
<html lang="ja">
  <head>
    <meta charset="UTF-8">
    <link rel="stylesheet" href="index.css">
    <title>Camera</title>
  </head>
  <body>
    <video id="video"></video>
    <script src="index.js"></script>
  </body>
</html>
移動のみで変更なしです。
app/index.css (旧 index.css)
* {
  margin: 0; padding: 0;
}

body {
  background: #000;
  overflow: hidden;
}

#video {
  display: block;
  position: absolute;
  top: 0; bottom: 0;
  left: 0; right: 0;
  margin: auto;
  width: 640px; height: 480px;
}
移動のみで変更なしです。
app/index.js (旧 index.js)
"use strict";

var dataUriToBuffer = require("data-uri-to-buffer"),
    fs              = require("fs"),
    ipcRenderer     = require("electron").ipcRenderer, // イベントやり取り用
    video           = document.getElementById("video"),
    canvas          = document.createElement("canvas"),
    ctx             = canvas.getContext("2d"),
    imageFilePath   = "./tmp/photo"; // 保存場所変更

ipcRenderer.on("shoot", _shoot); // main.jsからの"shoot"イベントを受け取ったら撮影

navigator.webkitGetUserMedia({video: true, audio: false}, _handleSuccess, _handleError);

document.addEventListener("keypress", function(evt) {
  if (evt.charCode === 32) {
    _shoot(); // 関数化
  }
}, false);

function _handleSuccess(localMediaStream) {
  video.style.display = "block";
  video.src = window.URL.createObjectURL(localMediaStream);
  video.play();
}

function _handleError() {
  alert("ERROR: カメラを起動できませんでした。");
}

function _shoot() { // 撮影を関数化
  canvas.width  = 640;
  canvas.height = 480;
  ctx.drawImage(video, 0, 0);

  fs.writeFile(imageFilePath + Date.now() + ".png", dataUriToBuffer(canvas.toDataURL()), function(err) {
    if (err) {
      // 失敗
      console.log(err);
    } else {
      // 成功
    }
  });
}
- 撮影した写真の保存場所変更
- 撮影を関数化
- main.jsからイベントを受け取ったときの処理追加
という編集を施しています。
web/index.html (新規ファイル)
<!DOCTYPE html>
<html lang="ja">
  <head>
    <meta charset="UTF-8">
    <meta name="viewport" content="width=device-width, initial-scale=1, minimum-scale=1, maximum-scale=1, user-scalable=no, shrink-to-fit=no" />
    <link rel="stylesheet" href="index.css">
    <title>SHOOT</title>
  </head>
  <body>
  <div id="btnShoot" class="btn shoot red adjust">
    <div class="hole">
      <div class="inner">SHOOT</div>
    </div>
  </div>
    <script src="index.js"></script>
  </body>
</html>
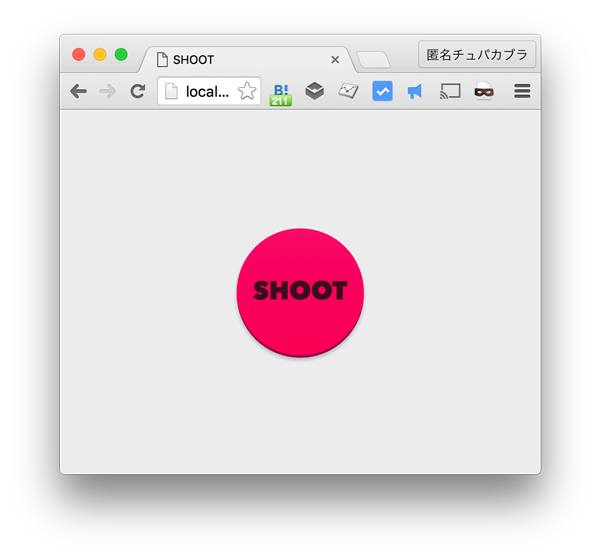
撮影ボタン(#btnShoot)を置いておきます。
web/index.css (新規ファイル)
* {
  margin: 0; padding: 0;
}

body {
  background: #ececec;;
  overflow: hidden;
}

.adjust {
  position: absolute;
  top: 0; bottom: 0;
  left: 0; right: 0;
  margin: auto;
}

.btn {
  border-radius: 50%;
  width: 120px;
  height: 120px;
  cursor: pointer;
  -webkit-user-select: none;
     -moz-user-select: none;
      -ms-user-select: none;
          user-select: none;
}

.btn .hole {
  position: relative;
  border-radius: 50%;
  width: 120px;
  height: 120px;
  box-shadow: 0 4px 4px rgba(0, 0, 0, 0.25);
}

.btn .inner {
  position: relative;
  border-radius: 50%;
  width: 120px;
  height: 120px;
  color: rgba(0, 0, 0, 0.8);
  font: 24px AvenirNext-Heavy;
  line-height: 120px;
  text-align: center;
  cursor: pointer;
  transition: opacity .6s ease;
  pointer-events: none;
  overflow: hidden;
}

.btn .inner:after {
  display: block;
  position: absolute;
  top: 0;
  left: 0;
  width: 100%;
  height: 100%;
  content: "";
  background: -webkit-linear-gradient(rgba(255, 255, 255, 0.1), rgba(255, 255, 255, 0));
  background: linear-gradient(rgba(255, 255, 255, 0.1), rgba(255, 255, 255, 0));
}

.btn:hover .hole {
  box-shadow: none;
}

.btn:hover .inner {
  top: 4px;
  box-shadow: none !important;
}

.btn:hover .inner:after {
  background: rgba(255, 255, 255, 0);
}

.btn.red .inner {
  background: #F50057;
  box-shadow: 0 2px 0 #880E4F;
}
本質ではないですが、ボタンにスタイルを当てておきます。
web/index.js (新規ファイル)
"use strict";

var btnShoot = document.getElementById("btnShoot");

btnShoot.addEventListener("click", function() {
  var xhr = new XMLHttpRequest();

  xhr.open("POST", "/shoot");

  xhr.onreadystatechange = function(evt) {
    if (this.readyState === 4) {
      if (this.status === 200 || this.status === 201) {
          // 成功時の処理
          console.log(evt);
      } else {
          // エラー処理
      }
    }
  };

  xhr.send();
}, false);
撮影ボタンが押されたことをPOSTでサーバに伝えます。
これで完成です。
electron .
で起動した後に、ブラウザで localhost:3000 にアクセスし、

SHOOTボタンを押すと写真が撮影されtmpディレクトリに保存されます。
アプリ書き出ししないでコマンドから実行してつかう分には困りません。(アプリ書き出しすると困ります)
テキストだけだと限界があるんで近々GitHubにサンプルをアップしたいですね。